[EN] Get Noticed 2017 – summary

It’s time to write short summary about Get Noticed 2017 challenge, because it is going to finish at the end of this month.
Well, I can admit it was a good time. It gave me a lot. This challenge motivated me everyday to learn new things and write about it on my blog. I chose to create an application using ASP.NET Core WebApi and Angular2 – ELP. Unfortunately I haven’t finished my app yet, but it’s important I tried to and finally I found a time to work on it in my spare time, after work.

I want to continue work on the ELP application in the next months to finish it some day
and release, I want to finish it by the end of the year, but we will se how it goes.

Blogging takes a lot of time so I will write less frequent than previously, to focus more on coding, but I’m not going to stop blogging so I encourage you to add my blog to your feeds, to be updated.

During DSP/Get Noticed 2017 I realized that it’s very hard to do pet projects after working hours
and focus on them in 100%. How much time do you have after work? I mean free time when you can do nothing. From my observations it’s about 2-3 hours.
You can spend all night of course, but the point is to do something after hours and be productive next day as well. What do you think about it? You can write me in a comment. It’s always a lack of time and because of it, some programmers
quit their job to have more time to focus on their projects. It’s also an option to consider –
if you are not addicted to money 😉

Besides summer is coming and the weather is great, so it’s good to go outside and move a little, e.g. ride a bike or travel. I’m going to do it and I recommend you to do the same, because it helps to create new ideas and extends our horizons, and after short break you can start to work with motivation and head full of ideas.

[EN] New features in C# 7.0: local functions, ref returns and others

This is the third and the last post about new features in C# 7.0. Today I will focus on:
– local functions
– literal improvements
– ref returns
– few other minor improvements

Local functions

It means we can create local function in a method. I don’t think I will use it often. We can achieve similar effect with Func/Action delegates. Anyway it’s nice to have feature.

Literal imporvements

We can write numbers with separator _ to improve readability or use binary literals to specify bit patterns instead of hexadecimal.

Ref returns

In C# 7.0 we can use ref to return reference to the specific thing, e.g. get reference to item number 1 from an array and store this reference in local variable. I think it can be helpful mostly for game developers for passing ref to big data structures.

Few other improvements

In C# 7.0 we get more improvements. I just want to list them shortly.
– Async methods can return other types than void, Task and Task<T>,
– we can use expression bodies in more places, e.g. accessors, constructors, finalizers. We can create constructor like this

– we can throw an exception in an expression

That’s all new features that we can use in C# 7.0. Hope you use it well 😉

[EN] New features in C# 7.0: Tuples

In the previous post I wrote about out variables and pattern matching in C# 7.0. Today I will focus on another features which are Tuples.

Tuple is not new thing, we have it already in C#, but this time the newest version of C# adds tuple types and tuple literals. With C# 7.0 we can implement method looks like this

GetValues method returns tuple object that contains three fields. Let’s take a look at example

As you can see in GetValues1 method I didn’t specified names for fields, so to get value we need to use default names like Item1, Item2, …, ItemN. We can change it and add our own names for fields. Take a look at the second example of method – GetValues2. In this method I specified field names: Val1, Val2, Val3. When we use this tuple return type we have a hint from IntelliSense with our field names. Item1, Item2, Item3 fields aren’t visible, but we can use it as well and it works.

1

In addition we can assign tuple return type to new local variables, it’s called deconstructing declaration.

If we want to assign result to existing variables we can do it as well.

It’s also good to mention that if you don’t use the latest .NET Framework, but you want to use the newest Tuples, you can do it. Just install the right package from NuGet Packages – System.ValueTuple.

[EN] New features in C# 7.0: out variables, pattern matching

Some time ago I wrote about new features in C# 6.0 and now it’s time to look at the features in C# 7.0 and what news it introduces. In this post I want to focus on out variables and pattern matching.

Out variables

In C# 7.0 we can declare a variable at the point it is passed as an out argument. I have created OutVariables class which contains sample methods implementation to demonstrate how out variables work. To have better view what it simplifies here we have two methods, one is in C# 6.0 (Cs6Style) and the second one is with C# 7.0 (Cs7Style).

Pattern matching

Pattern matching is another feature. In C# 7.0 we can use patterns only in is expressions and in case clausules for now, but it will be extended in the future versions of C#. Let’s take a look at the samples below.

Here we have SampleClass and two methods. Cs7Is method presents how to use is pattern and Cs7Case method presents how to use case pattern.
As you can see using is pattern is similar to the out variables, we can declare variable in the expression and use it later.
Case pattern allows us to extend switch statement. We can switch on any type, not only primitives. We can use patterns in case clausules and these clausules can have additional conditions.
That’s it for today, in the next posts we will take a look at the other features in C# 7.0.


[EN] How to upgrade Angular 2 project to Angular 4

About a month ago Angular 4 has been released. You may want to ask what about version 3? Well, there’s no Angular 3. We have Angular 4, but I have started to learn Angular 2 and now what? Should I start to learn Angular 4 and forget about version 2? The answer is no. The newest version is backwards compatible with 2.x.x version. It’s just an evolution rather than revolution.

What’s new?
– applications are smaller and faster – the size of the generated code was reduced by around 60 %
– improved *ngIf and *ngFor
– angular universal – project that allows devs to run Angular on a server
– TypeScript 2.1 and 2.2 compatibility
– source maps for templates – when there is an error in a template, source maps are generated
More will come soon with v 4.1.

If Angular 4 has been released, why not to use it in our new project? Let’s see if it is easy to upgrade Angular 2 project to Angular 4.
Open command line tool, go to app folder and type commands as below, then wait a little.

1

After this we can check version of angular in our app by command

As you see here it is, Hello Angular 4.0.3 🙂

2

So far it’s good, we will see for some time how it works 😉

[EN] How to populate database in ASP.NET Core Web Api

When we create our app it’s good to have some data in a database at some point, for example test user accounts or other values if we want to test something. How to populate database at the start of application if the database is empty?

First we need to create new class in our project. Let’s see how to do it on example.

I want to seed the database with test user with admin role, because I want to test loging functionality.

Here’s my class with Seed method.

What it does, it just checks if user „TestAdminUser” and role „Admin” exist in the database. If not it adds them and assigns role and claim to the user. If you are wondering what is User class, I have user class defined which is derived from IdentityUser class (Microsoft.AspNetCore.Identity.EntityFrameworkCore.IdentityUser), so it’s IdentityUser class with additional properties.

ELPIdentityInitializer class is not complicated, but we can add here more data. The question is how to load this data and when? As you probably guess, the good place is Startup class and Configure method, because it will be called only once at the start of application. To achieve our goal we need to add another parameter to this method. In my case it will be parameter of type ELPIdentityInitializer. In the body of Configure method, at the end (after UseMvc() method call) we need to execute Seed method from our initializer. This method is awaitable, so we can just wait for completion, because we don’t want to change Configure method to be asynchronous.

Additionally we need to register our initializer class in the service collection, because without it we will see an error while resolving class. To do it let’s add this line of code to the ConfigureServices method in Startup class.

I used AddTransient method here. It means service is created each time it is requested, but it’s not important here. Our service is requested only once at the beginning. BTW Transient lifetime works best for lightweight and stateless services.

After these few steps we should see result of our work which is populated database, in this case Users table.

1

[EN] How to read data from appsettings.json in ASP.NET Core Web Api

In my previous post about token authentication in ASP.NET Core Web Api I mentioned that is not a good practice to hardcode strings in controller or Startup class, especially if we want to put some sensitive data like key for SigningCredentials or connection string to database or configuration parameters. How to avoid it? We can add all strings to configuration file. In ASP.NET Core we have appsettings.json file which is the right place to put these kind of data. It looks like this by default in Web Api project

ok let’s say we want to add few parameters here, for example data to generate token (in my previous post you can read about generating token) in CreateToken method in one of my Controllers – LoginController.  Here is the method we want to modify.

We want in this case to read issuer and audience from config file, the same with „SuperSecretKey” to generate SymmetricSecurityKey. First we need to add these data to appsettings.json.

Then we need to modify the LoginController where CreateToken method is located.

We need to use IConfigurationRoot object to read data from config file. Let’s add it as private field and inject it in controller.

Now it’s time to replace hardcoded strings in CreteToken method.

Unfortunately that’s not all. It will not work. There’s one step we need to do.  In Startup class we need to register IConfigurationRoot object as a singleton. There’s property called Configuration by default

and we need to add this line of code to ConfigureServices method

That’s all. Since we have known about appsettings.json file it’s good to use it.

[EN] Token authentication in ASP.NET Core Web Api

In the previous post I showed how to implement cookie authentication in ASP.NET Core Web Api, this time I want to show you how to implement token authentication using JWT token. I strongly recommend you to read my previous post about cookie authentication, because it will be simplier to understand, besides source code showed below have some parts described in the previous post.

JWT structure

JWT stands for JSON Web Token. It is small, self-contained JSON. It contains credentials, claims and other information.

JWT consist of header, payload and signature.

Header contains algorithm for JWT and type of token.

Payload contains information that the server can use, e.g. user name, e-mail.

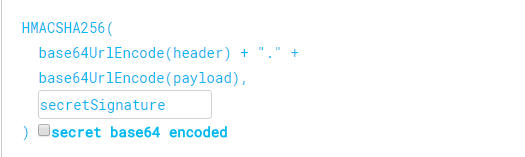
Signature is a secret key generated by server.
The goal is to send token to a client and the client will send it with every request back to the server to guarantee it’s rights. All information in token is encoded in Base64.

0

Here is a sample of encoded token

Useful web page for decoding JWT tokens is https://jwt.io/. I recommend you to check it.

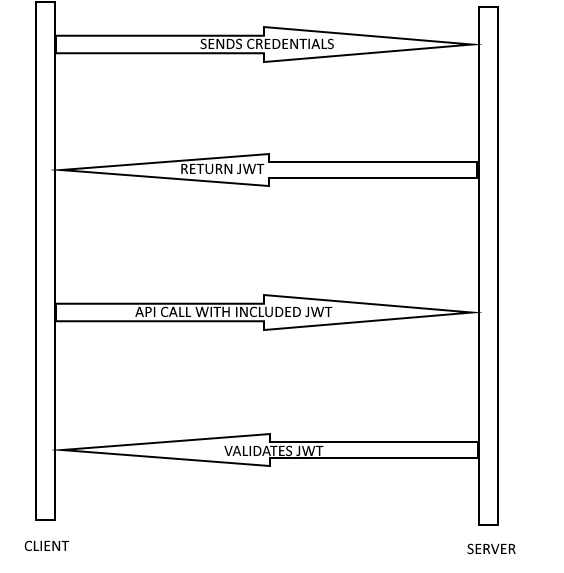
To better understand token authentication, take a look at the image below.

1a

Client sends credentials, server validates them and returns signed JWT token
to be able to validate it later. Client have to include untouched JWT with every call. It can decode header and payload, but not signature. Only server can decode signature, because the secret is never shared.

Implementation

We know theory, now it’s time to look into code.
Let’s implement method in controller responsible for generating token, but first it should validate user credentials. In the previous post I used SignInManager class for signin, but this time we don’t want this, because it will generate a cookie. We just want to validate user credentials without a cookie. We can use for it PasswordHasher class. I want to have cleaner code, so I added method for validation in UserService class and UserService is used in LoginController. Here is my UserService with added VerifyHashedPassword method that uses IPasswordHasher

As you can see here are additional methods: GetClaims and GetUserByUsername. GetClaims method will be used to get all information about user and GetUserByUsername finds user by username.
Next it’s time to use these methods in LoginController. Here it is, ready and working create token method.

First we need to find user by username. If the user is found then we can verify password hash. If credentials are good we create the token (BTW we need to add package System.IdentityModel.Tokens.Jwt first).

Then we create claims for user with all necessary informations, key and credentials. Key used to create SymmetricSecurityKey shouldn’t be hardcoded like this. It’s good to move it to configuration file, but I don’t want to complicate this example. Next we create JwtSecurityToken. Issuer and audience is our website that will accept this token. Expires tells how long token is valid.

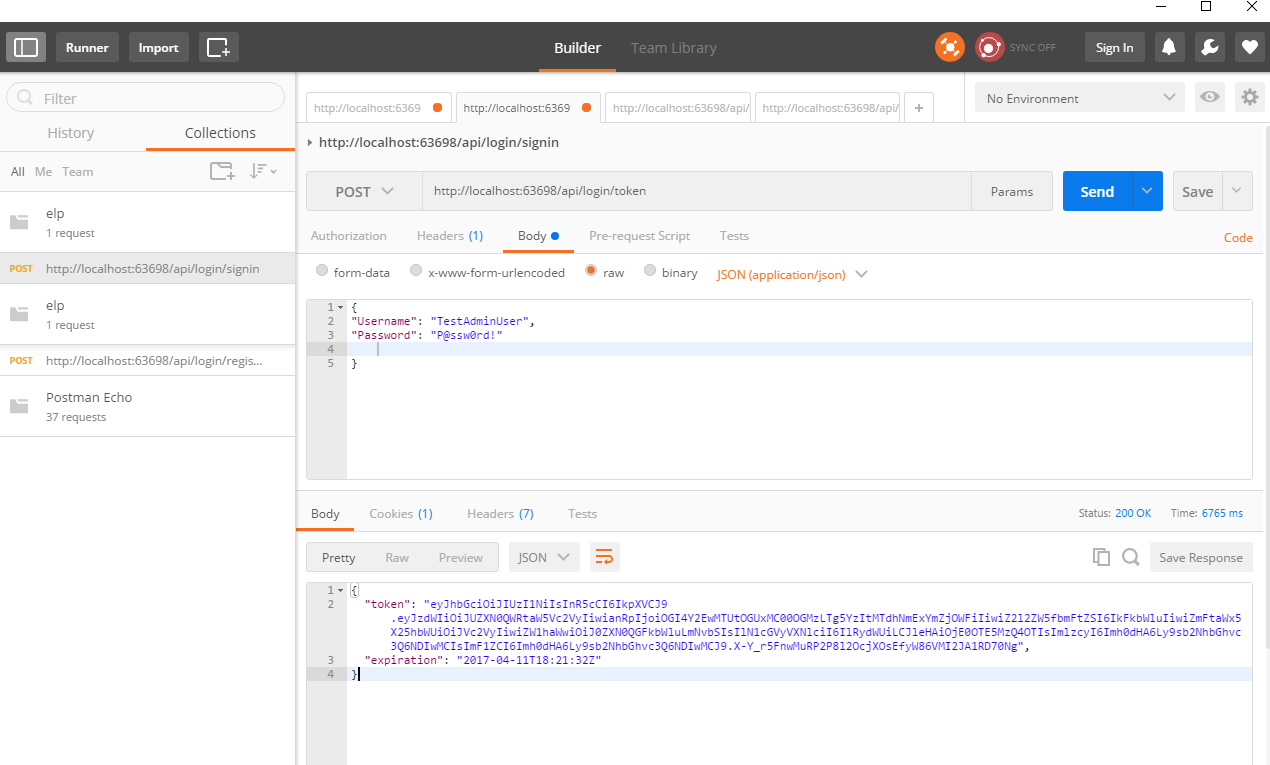
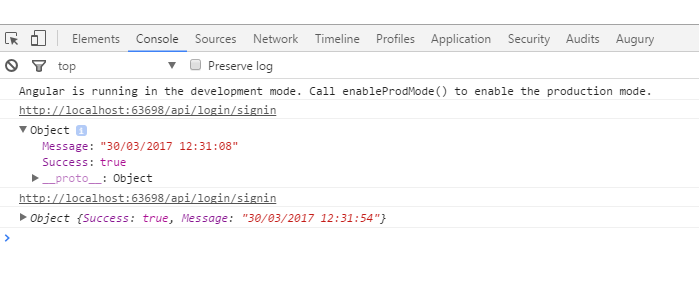
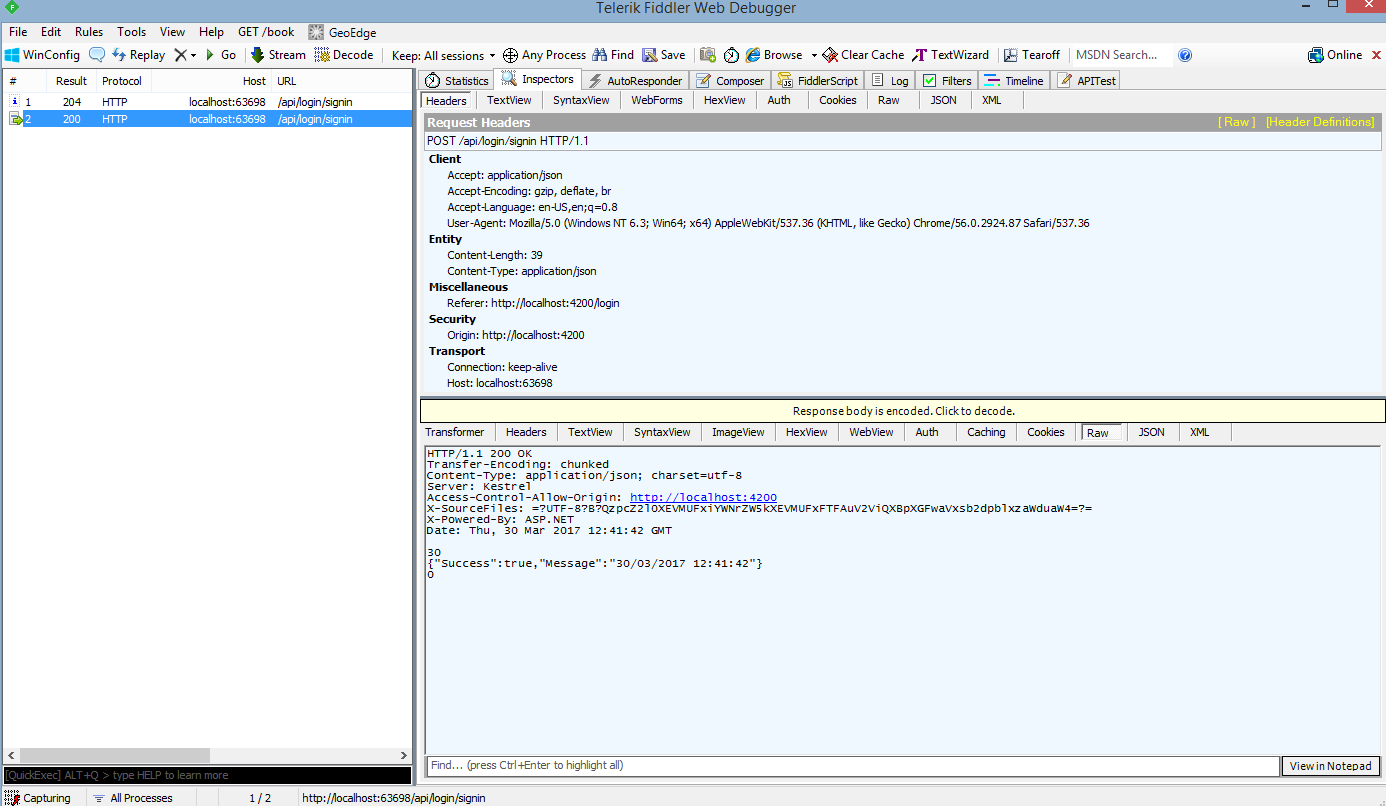
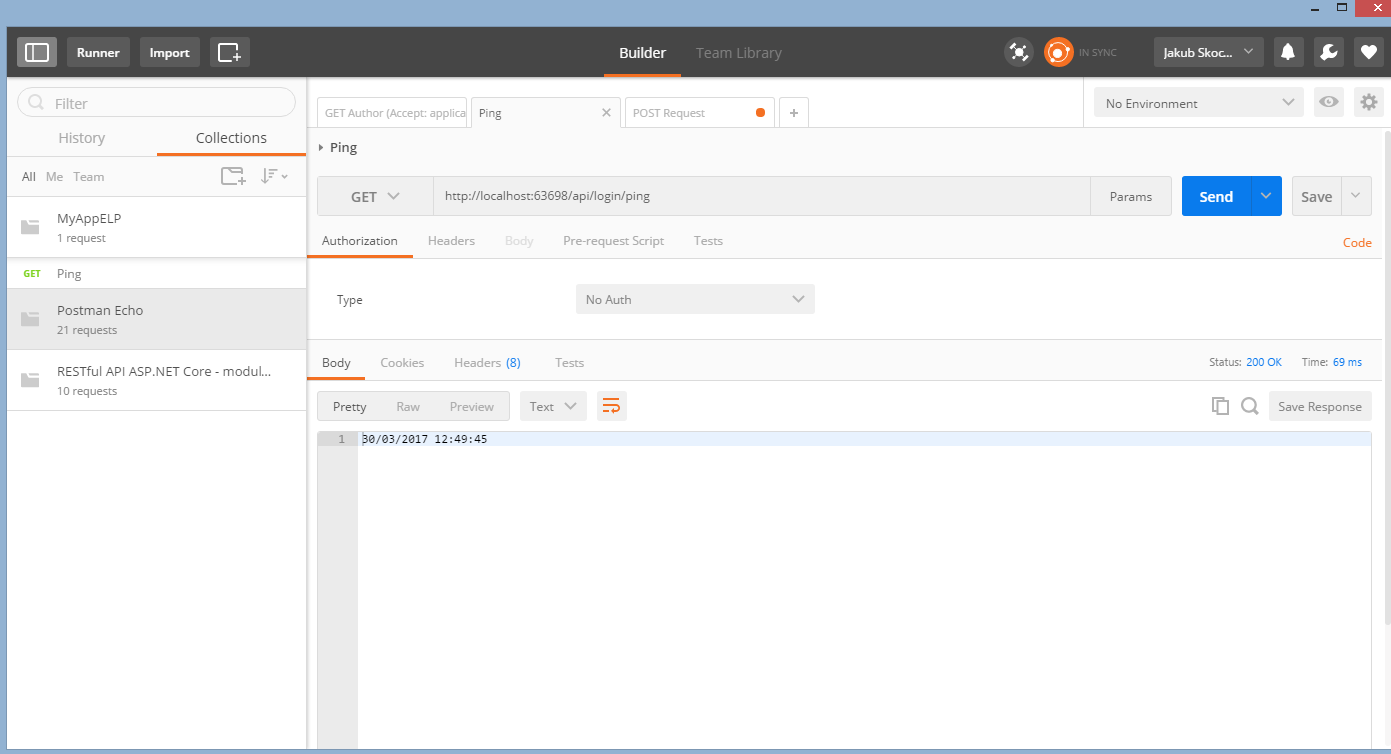
Now we can test it. Hit f5, open Postman and Send a request.

2

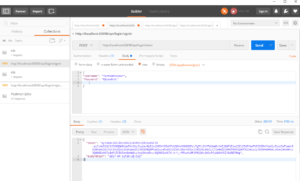
As you can see we get token in response to our request. It means we did it correctly.

Another thing to do is validating token send by a client.

In Startup class we need to use middleware for security token. Add few lines of code to Configuration method before UserMvc method call. We need to add also Microsoft.AspNetCore.Authentication.JwtBearer package.

TokenValidationParameters should be the same like in create token method. These strings should be also moved to configuration file.

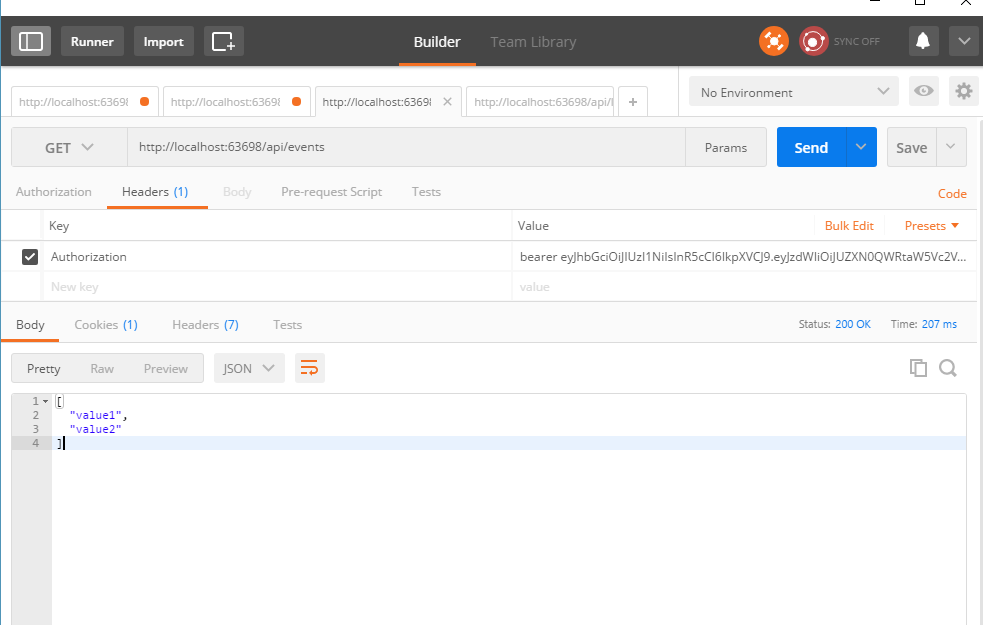
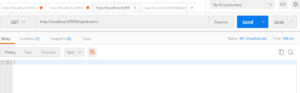
Let’s test it. For example I have EventsController that contains Get method which returns all events, but only for authorized users. If we try to get events we will get 401 Unauthorized error.

3

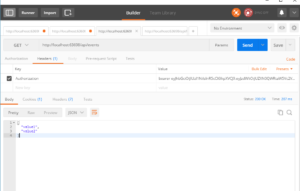
In this case we need to get token we generated before while testing create token method and put it in a request header with Key: Authorization and Value: bearer <token>. This time we should get status code 200. It means we have implemented token authentication in ASP.NET Core Web Api successfully.

 4

If you want to take a look at the source code it is available in my Github repo.

[EN] Cookie authentication in ASP.NET Core Web Api

This time I want to focus on user authentication. In APIs we can use different methods for user authentication like:

-cookie Authentication

-basic Authentication (not recommended, slow and insecure)

-token Authentication

In this post I want to show you how to implement cookie authentication in ASP.NET Core Web API.

First make sure you have installed Microsoft.AspNetCore.Identity.EntityFrameworkCore NuGet package in your project. Then let’s modify model a little bit.

Create User class derived from IdentityUser.

Next modify Context class. Our Context should be derived from IdentityDbContext<User> class. If your Context is derived from DbContext class, you need to change it. IdentityContext helps us to create all tables needed for user like Roles, Claims, Tokens, etc.

After these modifications, add another migration via Package Manager Console (type Add-Migration migrationName) and update database by Update-Database command. If you don’t know how to perform code first migrations take a look at one of my previous post.

If we have database ready, we can focus on our API project. In Startup.cs class in ConfigureServices method we need to add identity to services by adding this line of code:

where ELPContext is your app context and User is user class derived from IdentityUser.

That’s not all, we need to add more code, to specify how Identity should work. There’s a small problem with ASP.NET Core WebApi, when you call method that needs authorization you can get 404 Not Found Error instead of 401 Unauthorized. It’s because of default redirection to Account/Login page which can be helpful in ASP.NET MVC project but not in Web API. To handle it we need to set up application cookie events. Events allow us to override things that the IdentitySystem does. Add this code after AddItentity method call.

In the Configure method in Startup class we need to add another line of code before calling app.UseMvc() method:

We have configured our project, so let’s implement controller with register and login methods. I prefer to avoid logic in Controllers and use only services, so first we need to create UserService. This is my UserService for now.

I use UserManager and SigninManager that come from Microsoft.AspNetCore.Identiy namespace. These managers do a lot for us.

When we have service it’s time to use it in Controller.

We have two methods Register and SignIn. It’s time to test it. Hit F5, start your API and open Postman (If you don’t know what is Postman go to my previous post where I mentioned about it).

In Postman pick Post method call, add body which is raw JSON and hit Send. You should see success and status 200 like on image below.

1

To test Signin method, repeat above steps. You can see in the result in the Cookies tab there’s  cookie provided by ASpNetCore.Identity.Applcation. It contains information about the user. If you close the Postman or browser you have to re-authenticate. The cookie passed back and forth is the thing that going to know what the user is.

2

Next time I will show you how to implement Token based authentication which is recommended method of authentication 😉

If you want to take a look at the source code it is available in my Github repo.

[EN] Calling ASP.NET Core WebApi from angular app

In the last post I showed how to create service in Angular, now it’s time to try call ASP.NET Core webApi from it.
I created Login controller in my ASP.NET Core WebApi project which contains SignIn method. I want to execute it. I don’t have completed implementation so far, I want only to test if it works. As you see it is HttpPost method and it returns message with current date and status – true.

SignIn method gets UserDto as parameter and it’s important to add [FromBody] attribute, if we want to deserialize json object properly. Let’s start our webApi and try to call it from angular app. It will not work if you didn’t configure WebApi properly to talk with other app. You will see HTTP 415 unsupported media type error everytime you call api. It took me a while to figure it out why it didn’t work, but finally I have found a solution.

Asp.Net Core WebApi configuration

To be able to call our API with success, there is small change in the configuration needed. In Startup class we need to modify a little bit Configure method. Here is default Configure method in ASP.NET Core project

The solution is to configure CORS. There is only one line of code needed. It has to be added before calling UseMvc method.

What is CORS?

It is Cross Origin Resource Sharing. It allows web page to make requests to another domain. We need to enable CORS, because if we have two applications in this case:
– http://localhost:63698/  – backend
– http://localhost:4200/ – frontend
These are two different ports and request doesn’t work correctly without using CORS.
It can be dangerous of course, because we can allow to make requests from another malicious site, but we can specify to use CORS only from the specific origin, from our site, e.g. http://localhost:4200/. In addition CORS builder has a fluent api, so we can add chain of methods, e.g. AllowAnyHeader() or AllowAnyMethod() or we can specify accepted headers. Let’s try to test our app. Here’s my login form. I typed login data and I clicked Login. Let’s see what is in console output.

1 2Yeah it works! This time I used dev console built in Chrome to check result of my request, but there are few other alternatives I want to share with you. For sure there will be a lot of cases when you want to trace your requests in detail during project development. I can recommend you two tools that I use. The first one is Fiddler from Telerik and the second one is Postman. These tools allows you to create requests and inspect them. Let’s take a quick look on Fiddler.

4

It is desktop application where you can for example use filters to inspect only specific addresses, compose requests and even more.
Postman is desktop application too, but not only. It is also available as extension for Chrome browser. Postman doesn’t scan your network communication. It only allows to create requests and see results, but it is very nice. It allows to save created requests in files.

5

It is good to know these tools exist, because sooner or later you will find them necessary for daily work.