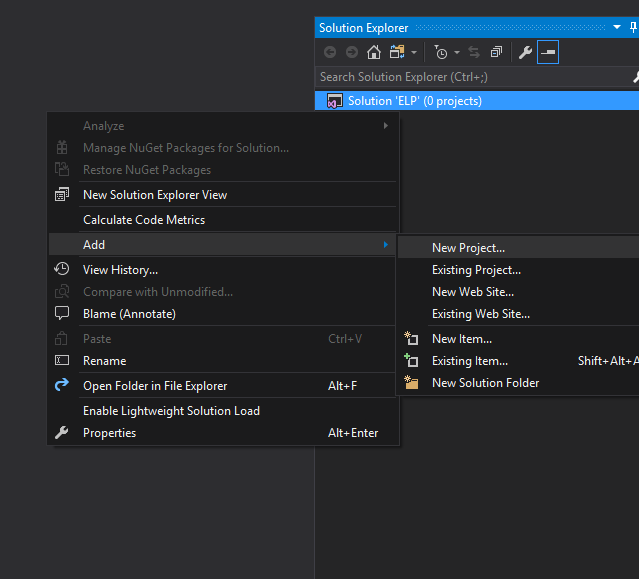
In this post I would like to show you how to create ASP.NET Core project using Visual Studio 2017. I’m using VS Community RC edition, but it’s not so important, you can use different edition. So, let’s create new empty solution and then add new Project.
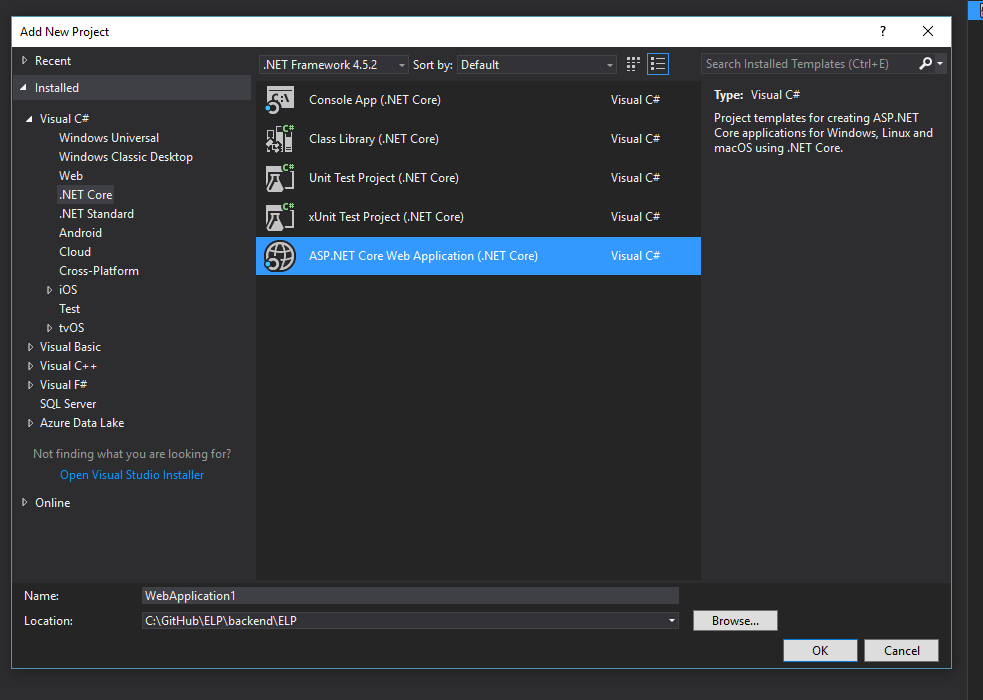
I want to create ASP.NET Core Web API project. Let’s choose correct template then.
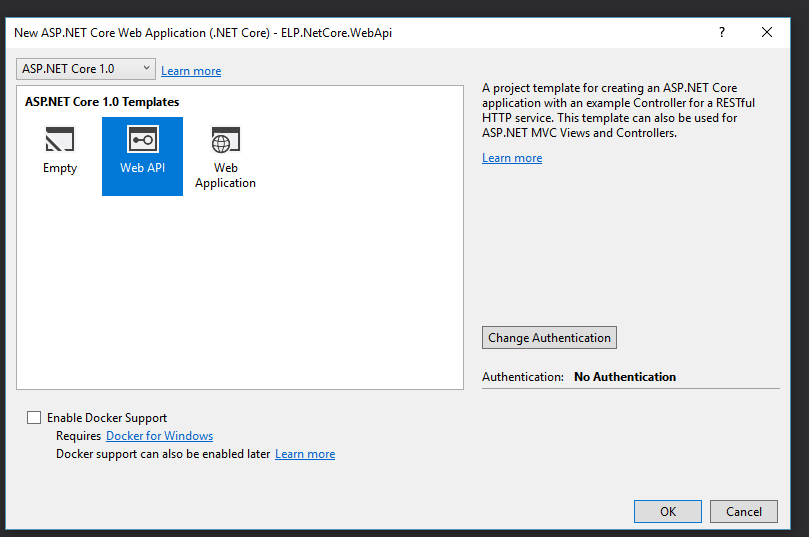
You will see new window where you can choose ASP.NET Core Template. I want to create Web API so I’m choosing it. You can choose authentication on the right hand side (Work or School Accounts or Windows Authentication), but I don’t want it. There’s also one very interesting feature here, look at the bottom of this window – there’s option to enable Docker support – WOW, but we will take a look at it maybe later 🙂 Yes, docker is also a thing that I want to learn about in practice.
Ok and project is created. It’s good to test our app if everything is ok. Push F5 and check. You should see new browser tab which displays:
[„value1″,”value2”]
Don’t worry, it means it’s fine 🙂 Project is ready, we can start to work on our API.
Hi Jakub. Thanks for the post! Could you write something more about differences between Web API and Web Application templates and why did you chose Web API for your project?
Hi Mateusz. Yes sure, let me shortly describe it. The Web Application template creates MVC project with Razor, views, css and jQuery.
The Web API template creates project that will allow you to respond to RESTful requests. It starts only with one controller. This template doesn’t contain views, css, etc. It is dedicated if you want to create backend of your application. I chose it, because I decided to split application to backend and frontend. I don’t want to have mixed backend with views in one project. I want to focus on pure Angular2 application and fleshy backend side.
Thanks Jakub. I also prefer to have backend and frontend in separate projects. What a pity that Microsoft put everything together in the Web Application template.