Category Archives: Programming

[EN] How to debug angular app in VS Code and Chrome

I have started to develop frontend side of my pet project and yesterday I worked on login service and I had to debug it. I use Visual Studio Code to write app in angular2 and typescript and I thought why not to use VS Code for debugging? Ok, but not so fast. Few steps are required to achieve it.

In VS code open cmd palette with key combination Ctrl+Shift+P and type:

Then type Debugger for Chrome in extensions manager and install it.

1

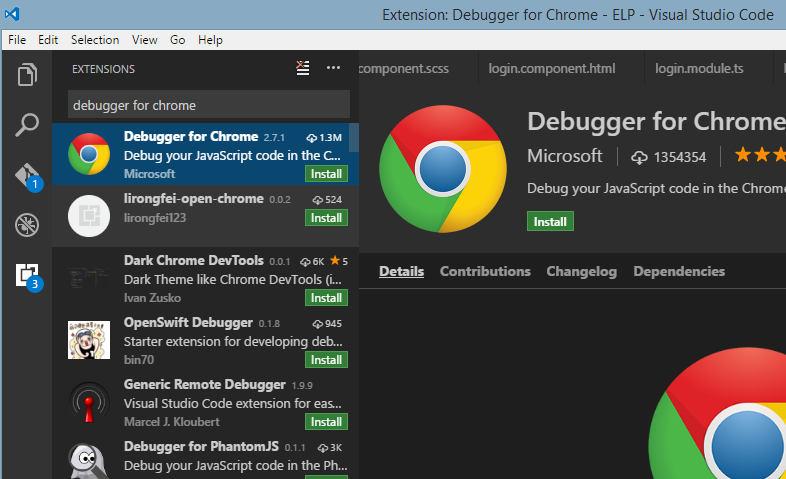
After installation restart VS code.

Next go to Debugger or press Ctrl+Shift+D and click on the gear icon to create launch.json file.

2

By default it looks like this:

but to be able to debug angular app you need to modify it. My launch.json file looks like this:

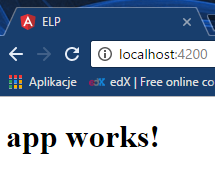
Url is default url where angular app is located,  port: 9222 is the port used by Chrome browser.

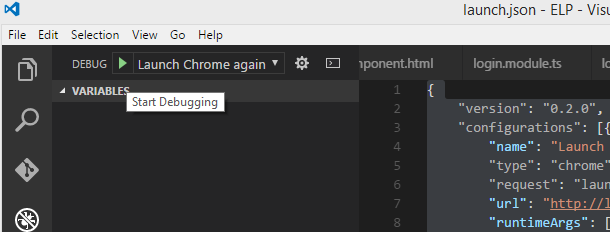
In this config file there are two configs, one of these is for launching chrome with attached debugger and the second one is for attaching existing chrome instance. Let’s try to launch new chrome window. Click on green start icon.

3

Now you can just put a breakpoint in VS Code, wherever you want and you can debug your angular app 😉

[EN] How to add Autofac container to ASP.NET Core app?

I created few projects in my solution. I have models, services, tests and webApi project. I added LoginController which uses Services, but it uses it by interfaces. I need to use dependency injection to resolve it for me. I decided to add Autofac. It is IoC container which allow us to register all types and it’s implementations, to inject specific types for us. In the last year I wrote post how to add Autofac to ASP.NET MVC app, but post is in Polish and adding Autofac to .NET Core app is slighty different than the last time.

First step to add Autofac to our project is to download nuget package Autofac.Extensions.DependencyInjection.

1

Next step is to register all types from assemblies. We need to do it for each assembly (install Autofac too). For example I have ELP.Model, ELP.Service, ELP.WebApi projects and I want to register all types from them. To do it let’s start from ELP.Service project. I prefer to add new interface to it. Just empty interface to determine assembly.

Add also new class derived from Autofac.Module class and override Load method.

As you see the interface is only to get type info from it to get all assemblies and register it in the container. We need to repeat these steps for each project (in my case ELP.Model, ELP.WebApi). This method is very helpful, because every type will be registered automatically without our attention. When we add new interface and class that implements it, no action is required. Autofac does all for us!

Ok if we have modules, it’s time to modify Startup class a little bit.
Add new property ApplicationContainer of IContainer type. Then Create Container builder in ConfigureServices method and register all modules in it, then build and return result in ApplicationContainer. Take a look at my Startup class below.

That’s it. You can ask what if I have few types that implements one interface? How Autofac handles it? It registers the newest one, but maybe there will be a situation when you want to register specific type, then you can do it like this

If you want to use Autofac in you applications I recommend you to take a look at the documentation, where you can read more about it.

[EN] Angular2 – project structure, changing css to sass, using CLI

Angular2 project structure

Few posts ago I showed how to create new Angular2 project using Angular CLI. Let’s take a look at the project structure. Here we have app folder which contains few items.

post7

Look at the diagram below to better understand this structure.

2

By default we have AppModule and AppComponent which is inside AppModule. This is how Angular2 project structure looks. We can have more components in one module and more modules with components of course.

34

Take a look into code. This is app.module class. It contains few core imports that come from angular library itself. There is also import of app.component class that has to be loaded. Beside it this class is empty for now.

Look at the app.component class. It imports angular/core only, but it has another interesting thing inside component. There is selector ‚app-root’ which will be used in index.html to display component interior, templateUrl which is link to html file with view for this component, styleUrls which is link to css file for our view. Inside class AppComponent we have title – ‚app works!’ which is visible when you run application.

Changing css to sass

Ok, we have css, but what if I want to have sass – css with super powers 😀 Sass is CSS pre-processor and allows you use variables, nested rules and more. It allows to create stylesheets faster. To change css to sass, first we need to download sass with npm

then set default extensions in our project

then we need to change styles from .css to .sass in .angular-cli.json file

and rename file from app.component.css to app.component.sass and rename another file from styles.css to styles.sass. In addition there’s one modification needed in app.component.ts file. StyleUrls should refer to sass file, not css file.

ok project supports sass files now.
Let’s implement something in our project. As I mentiond before about modules and components, every module should be created for one feature.

Using CLI

I want to start from implementing login module, so let’s create module using CLI.
It is so simple. Just type in powershell command

this command will create new module file in folder. Awesome! You don’t need to know best practices for organising your project, CLI does it for you.

5

The same situation is when we want to add component or service. Try it.

After executing these commands app folder looks like this. I created login.service, because it will be a part responsible for communicating with WebApi. Login.component will use this service. Unfortunately login.service is not in login folder. I want to have everything connected with login in one folder for better organisation so I will move it.

6

In official angular cli’s readme , we can see all possibillities that we have to generate files.

7

You can read more here.
Ok, project is ready to start implementation of login component. Maybe I will describe in next post how to connect WebApi. We will see 😉

[EN] Entity Framework Core – Code First migrations

In this post I want to show you how to create new database using Entity Framework Core – Code First migrations approach.

codefirst

I have project ELP.Model in which I defined few entities. I want to create database from it. It is approach called Code First. This is how looks one of my entity

To be able to enable migration and create database, we need to create Context. My Context Class looks like this

We need to install few packages before we start with actual migration.

To do it, open Package Manager Console (In VS Tools-> Nuget Package Manager -> Package Manager Console) set Default Project to your target project and install packages. Make sure to install the newest versions or the same versions for all.

To enable migrations in our project first we need to type in the same console Add-Migration MigrationName

and here is surprise. Not so easy man. I missed something. Yes exactly, we need to add implementation of IDbContextFactory<ELPContext>

1

This class should look like this:

Another Try to Add Migration and … another error…

2

What da… !? It looks like it is an issue in EF Core v 1.1.0. Work around for it is to change version to 1.0 :/ To do it we need to modify TargetFramework in csproj file from netcoreapp1.1 to netcoreapp1.0

3

4

Another try

Uff now everything works fine.

5

Take a look into Solution Explorer. Here we have new classes and Migrations folder.

6

The last step is to execute Update-Database command in Package Manager Console.

Fortunately this time it worked for me in first try. I didn’t expect it will be so easy 😉

To verify it, open SQL Server Object Explorer and check it. It should create new database.

7

Yeah, we have created database, nice. Now we can add something to it 🙂

[EN] How to mock DbSet in Entity Framework

duck-mock-dbset

duck as mock

In my project ELP I decided to start with core implementation of backend side. I started with service for sign in and register user accounts. I use TDD approach, so I create test with expected result that fails at the beginning and then I implement code to pass this test.

I created MembershipService in my project that is responsible for creating accounts, validating, etc. This service uses other services like UserService for getting users from database or UserRoleService for getting user roles. Services use context, (BTW I rejected using repository pattern, maybe I will describe more about it in the future) and context contains DbSets.

First problem that you can meet is how to mock this thing?

Let’s see how to write a test for method GetUserByUsername.

This is my test. I use xUnit testing framework and Moq for mocking. If you want to use it as I, you need to install it from Nuget Packages manager.

As you see I created list with one user and I want to pass it to my context, It will act like data get from database. First we need to create our DbSet for Users. I have little helper method for it. It is generic, so you can use it too.

Ok, so first test we have completed, but there’s one more thing that I wanted to share with you.

Let’s get back to my service that I mentioned before – MembershipService. I’d like to test CreateUser method which at the end adds user entity to User’s DbSet. Problem is with verifying it if you use mocks. If you check User’s DbSet from Context class there’s nothing in it. Null. And here comes Verify method from Moq framework that helps.

Here are 3 lines of code from my testing method, it executes CreateUserMethod, so I expect User’s DbSet will contain one item and UserRole’s DbSet will contain two items.

With help of Verify method result is as expected and test is green.

If you want to read more about testing Entity Framework you can go to https://msdn.microsoft.com/en-us/library/dn314429(v=vs.113).aspx

[EN] Visual Studio 2017 in English

This time it’s short post. I’d like to share with you one thing about the newest Visual Studio 2017.

As you know I decided to write posts in English and share my experience with you, so I want to attach screenshots from Visual Studio which is in English, it’s simple isn’t it? Previous versions was in English by default, but not this time…

I decided to write about it, because it took me a while to figure it out. Maybe it’s obvious, but you can save time when you read this and you will encounter this problem.

When you install VS 2017 it decides for you what language to use by default and it’s your operation system’s language. I have Windows in Polish, so my VS was in Polish too. I noticed that some attendands DSP 2017 contest use Polish version, but it looks very weird in my opinion. I didn’t want it, so I had a small problem. How to change language?

It’s not that simple.

You can open Tools->Options->Environment-> International Setiings but there’s no English. What!? Ok, so I opened stack overflow and search for solution 😀

Working solution for it is to open VS installer and go to Modify or „Modyfikuj” in my case.

1

If you haven’t got it as I before, you need to update your version of VS and try again and then click on Language packages or „Pakiety językowe” when you use Polish version of Windows. Then you can choose languages you like to install.

2

Great, so modify your installation, open VS after it and get back to Tools->Options->Environment-> International Setiings . You will see more options 😉

3

[EN] Creating Angular2 CLI project

What is Angular2 CLI?

Angular2 CLI is Command Line Interface introduced by Angular team, to help us develop applications in Angular 2, through automate some operations and keep consistent project structure. You may think it’s a waste of time to learn another new thing, but I encourage you to use CLI, even if you are new to Angular. It’s even more helpful in this case, because with CLI your development will be faster and easier.


Before we start make sure you have node.js installed on your machine. If not, you can download it here
https://nodejs.org/en/download/. It is essential to develop Angular applications.

Let’s start

To create new Angular2 CLI project, open your command line tool. At the beginning you need to install angular CLI, to do it type:

1

Wait for a while, take a beer or yerba mate if you prefer and come back after few minutes 😛

Then type command that will create new project, something like this:

Where PROJECT_NAME is any name for your project. As you can see you need to wait for install packages via npm, so take another beer don’t waste your time 😉

2

After that go to project location, dig in your project folder, type cd PROJECT_NAME. You will se new files and folders here like on image below. This is our brand new project.

3

And let’s do the magic. Type ng serve and you will see…  an error maybe, but you should’n if everything you did before correctly. If everything works fine your console output should looks like this:

4

Open your browser and type http://localhost:4200 you should see:

5

It means you have working app! Congrats ;0

For developing our front end side of application, I recommend you Visual Studio Code Editor. You can download it here. https://code.visualstudio.com/

Open whole folder of your new application in VS Code

6

That’s it. Project structure and other Angular2 CLI features I will cover in the next posts.

[EN] How to create ASP.NET Core project using Visual Studio 2017

In this post I would like to show you how to create ASP.NET Core project using Visual Studio 2017. I’m using VS Community RC edition, but it’s not so important, you can use different edition. So, let’s create new empty solution and then add new Project.

1

I want to create ASP.NET Core Web API project. Let’s choose correct template then.

2

You will see new window where you can choose ASP.NET Core Template. I want to create Web API so I’m choosing it. You can choose authentication on the right hand side (Work or School Accounts or Windows Authentication), but I don’t want it. There’s also one very interesting feature here, look at the bottom of this window – there’s option to enable Docker support – WOW, but we will take a look at it maybe later 🙂 Yes, docker is also a thing that I want to learn about in practice.

3

Ok and project is created. It’s good to test our app if everything is ok. Push F5 and check. You should see new browser tab which displays:

[„value1″,”value2”]

Don’t worry, it means it’s fine 🙂 Project is ready, we can start to work on our API.